Want to unlock the full potential of Photoshop’s Pen Tool? Explore how it can enhance your design projects, from cutting and drawing to creating perfect curves and selections.
The Pen Tool is one of Adobe Photoshop’s most powerful and versatile features. Whether you’re a seasoned graphic designer or a beginner, mastering the Pen Tool can significantly elevate the precision and control in your work. This article will guide you through different aspects of the Photoshop Pen Tool, from basic drawing techniques to creating selections and refining your designs.
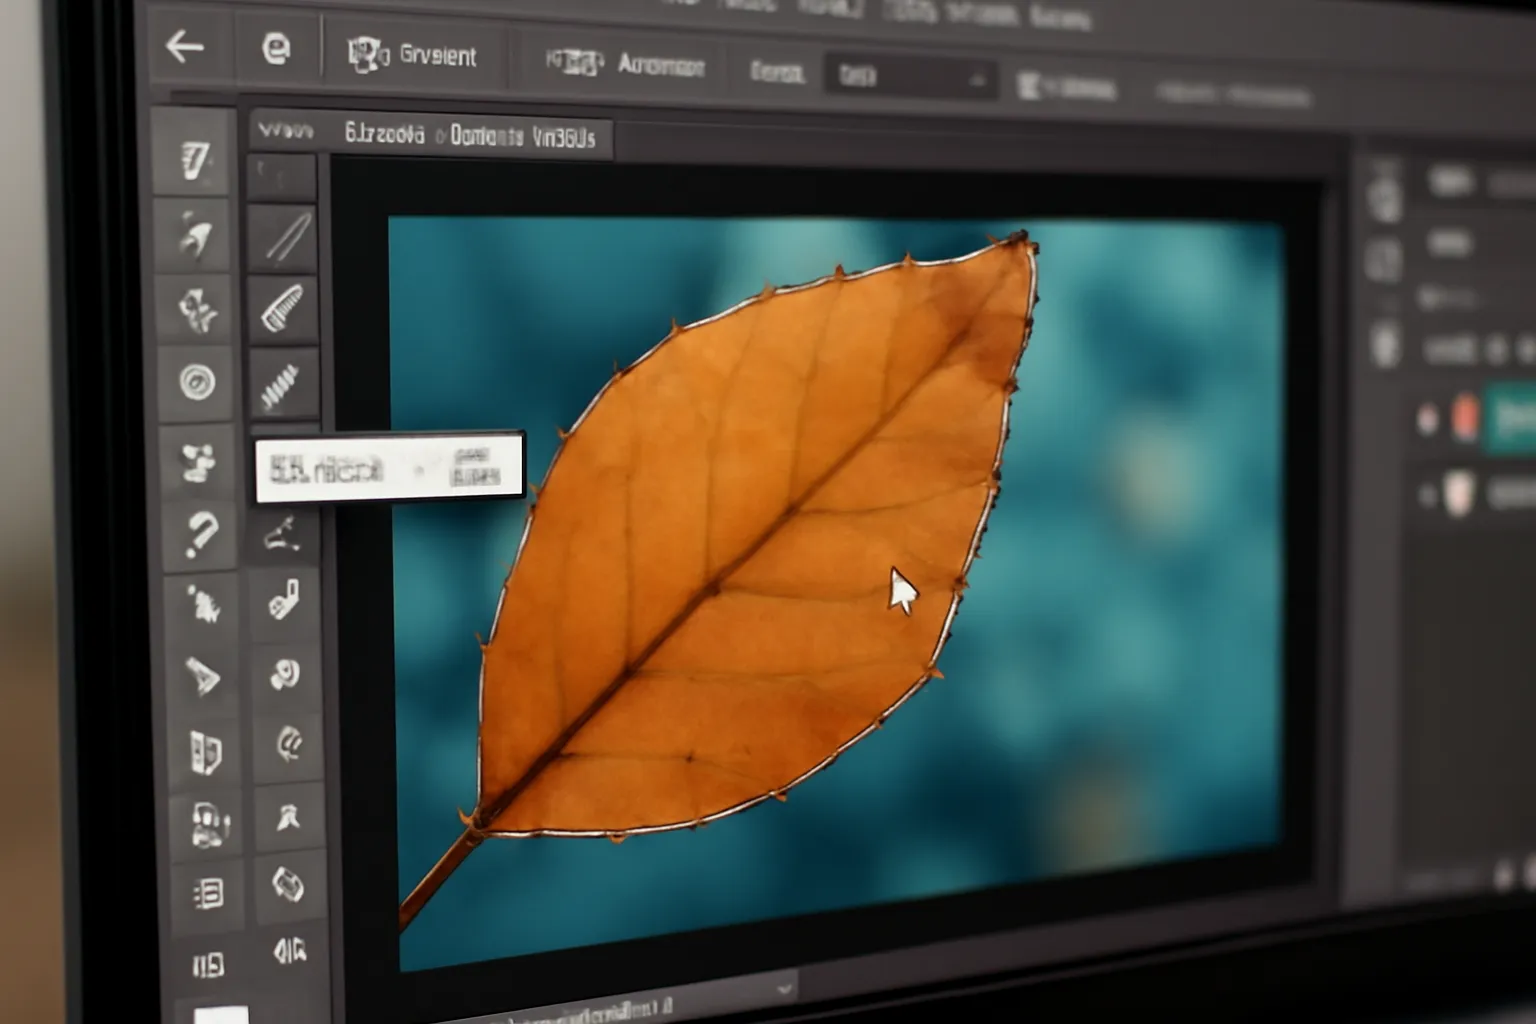
Photoshop Pen Tool Cutting
When it comes to cutting out objects from an image, the Pen Tool is invaluable. Unlike the Magic Wand or Lasso tools, which often result in jagged or imprecise edges, the Pen Tool offers clean, smooth cuts that are perfect for isolating intricate details.
Creating a Path for Cutting
The first step is to use the Pen Tool to create a path around the object you wish to cut out. Click to create anchor points along the edges of the subject. These anchor points can be adjusted to follow even the most complex curves, ensuring that the outline matches the object perfectly. After creating the path, you can convert it into a selection by right-clicking the path and choosing Make Selection. This step ensures that the cut is accurate, with sharp edges and no unwanted artifacts.
Practical Example: Cutting Out a Product for a Catalog
Consider you are working on an e-commerce project and need to isolate a product from its background. Using the Pen Tool, you can outline the product with precision, creating a perfect selection. Once selected, you can remove the background and place the product on any new backdrop or create shadows for a realistic effect. This technique is especially useful for product photography, where clean edges are essential.
Pro Tip: Use the “Subtract from Path Area” Option
While working with the Pen Tool, you might encounter overlapping shapes or paths that need refinement. In such cases, use the Subtract from Path Area option to remove unwanted sections from your path. This feature is particularly useful when working with complex cutouts, allowing you to make adjustments on the fly.
👉Learn More About Photoshop Pen Tool Cutting👈
How to Use the Photoshop Pen Tool
Understanding the basics of the Pen Tool is key to unlocking its full potential. This tool is designed to create vector shapes and paths, which are scalable and can be easily manipulated without losing quality. It’s the go-to tool for anyone serious about digital design, whether it’s for logo creation, intricate illustrations, or cutting out objects.
Basic Pen Tool Techniques
The Pen Tool works by creating anchor points, which are connected by paths. These paths can be straight or curved, depending on how you manipulate the handles attached to each anchor point.
-
Straight Lines: Click to create anchor points for straight lines.
-
Curved Lines: Click and drag to create anchor points that control the direction and curve of the line.
-
Close the Path: To complete a shape, return to the first anchor point, and click to close the path.
Practical Example: Drawing a Simple Logo
Imagine you’re designing a logo for a tech company. Using the Pen Tool, you can create a series of clean, geometric shapes, manipulating the curves to create a sleek design. By mastering the Pen Tool’s various features, such as adjusting anchor points and refining curves, you can build a professional-looking logo with sharp edges and perfect symmetry.
Pro Tip: Use the Convert Point Tool
To make more precise adjustments to your paths, use the Convert Point Tool. This tool allows you to toggle between smooth and corner points, helping you control the direction of your curves. It’s especially useful when you want to switch between straight lines and curves without having to start over.
👉Learn How to Use the Photoshop Pen Tool More Effectively👈
Photoshop Pen Tool Coloring
One of the most powerful features of the Pen Tool is its ability to help with precise coloring and shading, especially when you are working with complex designs or illustrations. By converting your paths into selections, you can fill areas with color, ensuring that your designs stay neat and professional.
Filling Paths with Color
Once you’ve created a closed path using the Pen Tool, you can easily fill it with a color by converting the path into a selection. Afterward, choose a color from the color palette and use the Fill option to apply it to the selected area. This technique is commonly used in digital illustration and graphic design.
Practical Example: Creating Digital Art
Let’s say you’re working on a digital painting or character design. After outlining the character’s body using the Pen Tool, you can fill different sections with various colors to create a well-defined image. By using the Pen Tool’s ability to create smooth, even edges, you can ensure that the lines remain clean, which is crucial when working with layered colors.
Pro Tip: Use Layer Masks for Advanced Coloring
To enhance your designs, use Layer Masks in conjunction with the Pen Tool. This allows you to add intricate details, like shading and gradients, without affecting the underlying artwork. The result is a clean, non-destructive workflow that’s ideal for complex projects.
👉Master the Art of Coloring with the Photoshop Pen Tool👈
Conclusion
Mastering the Photoshop Pen Tool opens up endless possibilities for graphic design, illustration, and photo editing. By understanding its different applications—whether for cutting out objects, creating precise paths, or filling areas with color—you can bring your creative ideas to life with professional-level quality. While the Pen Tool can initially feel intimidating, with practice, you’ll gain the skills needed to work efficiently and confidently.
Remember, the Pen Tool isn’t just for advanced users. With a bit of practice, anyone can learn how to use it effectively, whether you’re creating a simple selection or a complex design. Keep experimenting, and soon you’ll find that this tool is one of your most valuable assets in Photoshop.
“Design is thinking made visual.” – Saul Bass. Take your Photoshop skills to the next level by practicing the Pen Tool and refining your workflow.