Have you ever wondered how professional photographers achieve that crisp, clean subject focus with a beautifully blurred background? It’s all possible with Photoshop, and today we’ll walk you through how to apply background blur effects to make your images stand out.
Curious about how to create a blurred background in Photoshop? Learn how Photoshop character background blur, background blurry techniques, and wallpaper blur can transform your photos with this easy guide!
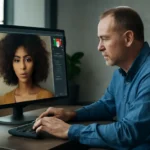
Photoshop Character Background Blurred
In Photoshop, blurring the background behind a subject is one of the most common techniques to draw focus to the person or object in the frame. This effect, often referred to as “bokeh,” is achieved by adjusting the depth of field in an image. The blurring of the background creates a soft, out-of-focus look that highlights the subject and gives the image a more professional feel.
How to Blur the Background Behind a Character
-
Select Your Subject Start by using the selection tools like the Quick Selection Tool or the Pen Tool to isolate your character from the background. Take your time to make a precise selection.
-
Refine the Edges After selecting the subject, use the ‘Select and Mask’ option to refine the edges. This ensures that no part of the subject is mistakenly blurred.
-
Create a Layer Mask Once your subject is isolated, add a layer mask to the selection. This will keep your character in sharp focus while the background becomes the area to blur.
-
Apply the Blur Use the Gaussian Blur or Lens Blur effect to the background layer. This effect mimics the look of a camera’s aperture, creating a shallow depth of field.
-
Adjust the Blur Strength Adjust the blur amount until the background becomes soft and visually pleasing. Experiment with different settings to get the right level of blur that complements your subject.
This process allows for easy and quick manipulation of your images, bringing the subject into sharper focus while still maintaining a visually appealing background.
Photoshop Background Blurry
Blurring the background in Photoshop isn’t just for portraits; it can enhance a variety of photos including landscapes, still lifes, and even architectural shots. A blurry background can reduce distractions and ensure that the main focus of the image stands out.
How to Achieve a Background Blur in Photoshop
-
Duplicate the Background Layer Always start by duplicating the background layer. This allows you to make non-destructive edits.
-
Select the Area You Want to Blur Use the Marquee Tool or Lasso Tool to select the background. You can also use a gradient mask for a more seamless transition between the sharp and blurry parts of the photo.
-
Feather the Edges To avoid sharp transitions between the blurred and in-focus areas, feather the edges of your selection slightly. This ensures a smooth blur effect.
-
Apply the Blur Effect As with the previous method, Gaussian Blur or Lens Blur can be applied. The Lens Blur filter, in particular, mimics the way light is rendered in out-of-focus areas, making it more natural for some images.
-
Adjust the Radius The key to a good blurry background is to find the right radius for your blur. Too much blur can make the background unrecognizable, while too little will fail to achieve the desired effect.
By mastering this simple technique, you can easily turn an ordinary background into something extraordinary, making your subject pop out.
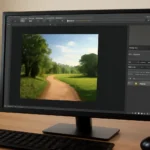
Photoshop Wallpaper Blurred
Wallpaper images are often designed to add a soft and subtle background that doesn’t distract from icons and other elements on the screen. Photoshop’s background blur effect can help achieve this polished look.
How to Create a Blurred Wallpaper Background in Photoshop
-
Open the Image Start by opening the image you want to turn into wallpaper. It could be anything from a scenic landscape to an abstract design.
-
Select the Focus Area In some cases, you may want a certain part of the image to remain sharp while the rest becomes blurred. Select the area that should stay in focus.
-
Apply the Blur to the Rest With your selection in place, apply the blur to the remaining part of the image. Gaussian Blur is usually enough for this effect, but if you want a more artistic result, try Motion Blur or Radial Blur.
-
Resize the Image After applying the blur, adjust the resolution and dimensions of your image to fit your screen size. The right resolution ensures that the wallpaper looks sharp when displayed.
-
Save and Use Save the image in a format compatible with your device (such as PNG or JPG) and set it as your desktop wallpaper.
This technique is perfect for creating serene, minimalist wallpapers where the blur adds a sophisticated touch without overwhelming the eyes.
Conclusion
Whether you’re working on a portrait, a landscape, or even designing a wallpaper, the ability to blur backgrounds in Photoshop can elevate your work to new heights. The techniques are straightforward, yet highly effective at focusing attention on your main subject, whether it’s a person or a beautiful landscape. With a little practice, you’ll be able to blur backgrounds like a professional, creating striking visuals that capture attention.
Remember, experimentation is key! Play around with the blur settings and masking techniques to see what works best for each project. Once you get the hang of it, you’ll find that Photoshop’s blur tools are some of the most powerful in your editing toolkit.